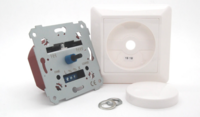
Installing a Jung dimmer is a great way to gain full control over your lighting. Jung offers high-quality dimmers for different types of lighting, including LED, halogen, and incandescent bulbs. Whether you opt for a traditional rotary dimmer or a modern touch version, the installation is usually quick and straightforward. In this article, we’ll guide you step-by-step through installing a Jung dimmer, choosing the right model, and safely completing the setup.
Before you begin, it’s important to choose a Jung dimmer that matches your lighting type. Jung offers various models tailored to different needs:
Always check the minimum and maximum load in watts. This is especially important for LEDs, which often draw very little power. Choose a dimmer with a low minimum load (e.g., 3 watts) if you're using only one or two low-wattage bulbs.
Installing a Jung dimmer is manageable for most DIYers, provided you follow safety instructions and connect everything correctly. Here’s how to do it:
Go to your circuit breaker panel and turn off the power to the lighting circuit you’ll be working on. Use a voltage tester to confirm that the wires are no longer live before touching them.
Take off the cover plate and unscrew the old switch mechanism. Carefully pull the switch out of the wall box and disconnect the wires. Take a picture of the wiring setup for reference if needed.
A typical Jung dimmer includes the following terminals:
Strip the wires if necessary and insert them firmly into the correct terminals. Make sure the copper is fully inserted and the insulation stops right at the edge. Tug gently to ensure a tight fit.
Carefully push the connected dimmer into the wall box and screw it in place. Reattach the cover plate. Turn the power back on and test the dimmer. The light should turn on and dim smoothly. Some Jung dimmers have a small dial to adjust the minimum dimming level for flicker-free performance.
While installing a Jung dimmer is straightforward, mistakes can happen. Here’s what to avoid and how to ensure a stable setup:
With the right tools, a compatible dimmer, and some attention to detail, installing a Jung dimmer is a practical and rewarding DIY task. You’ll enjoy full control over your lighting and the perfect ambiance in any room.
No comments found.
